在之前的SwiftUI应用CoreData小纸条(三)里我们优化了Entity的调用、尝试对搜索增加过滤、还定制了一个万能ListView。接下来我们要为英语小助手里的Chapter增加子项Topic了。这是两个Entity,在数据中是一个一对多的模型。
新增Topic Entity
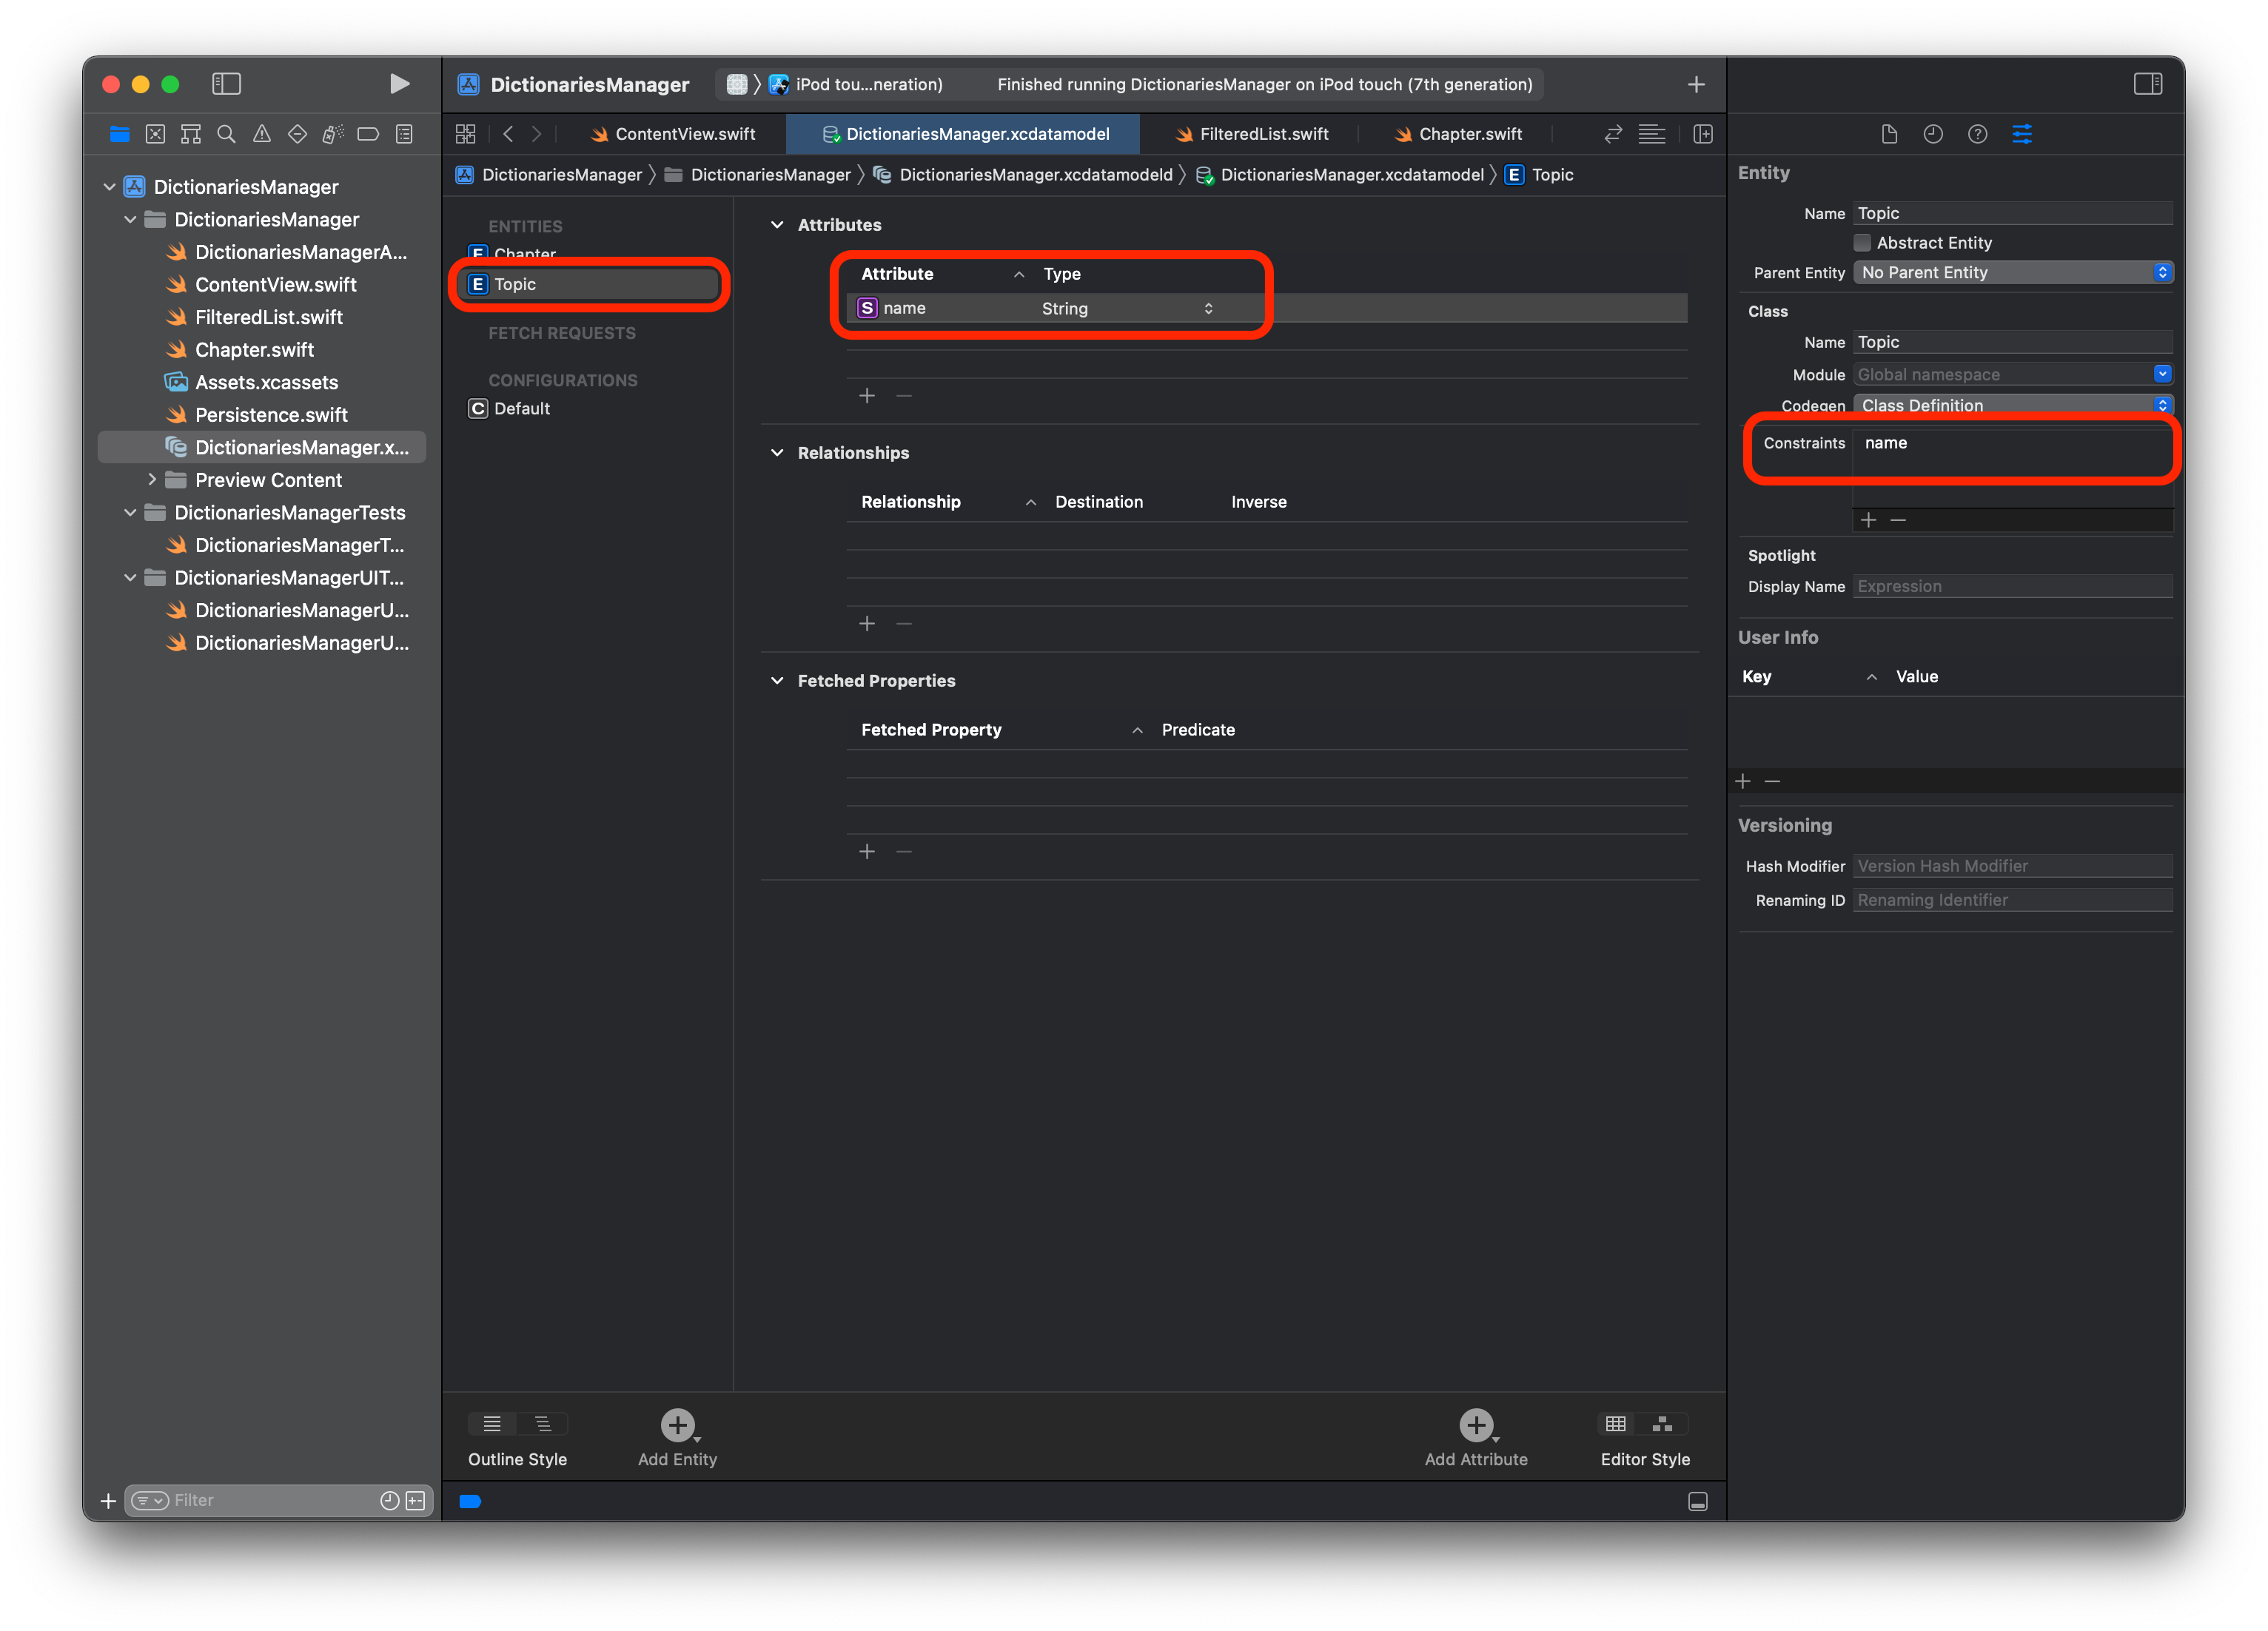
我们先新增一个Entity,名称为Topic,有一个Attribute为name,这个name内容也应该是不重复的,所以我们在Topic Entity的Constraints里加入name,如下图:
设置Chapter与Topic的一对多关系
在Chapter中设置对应多个Topic
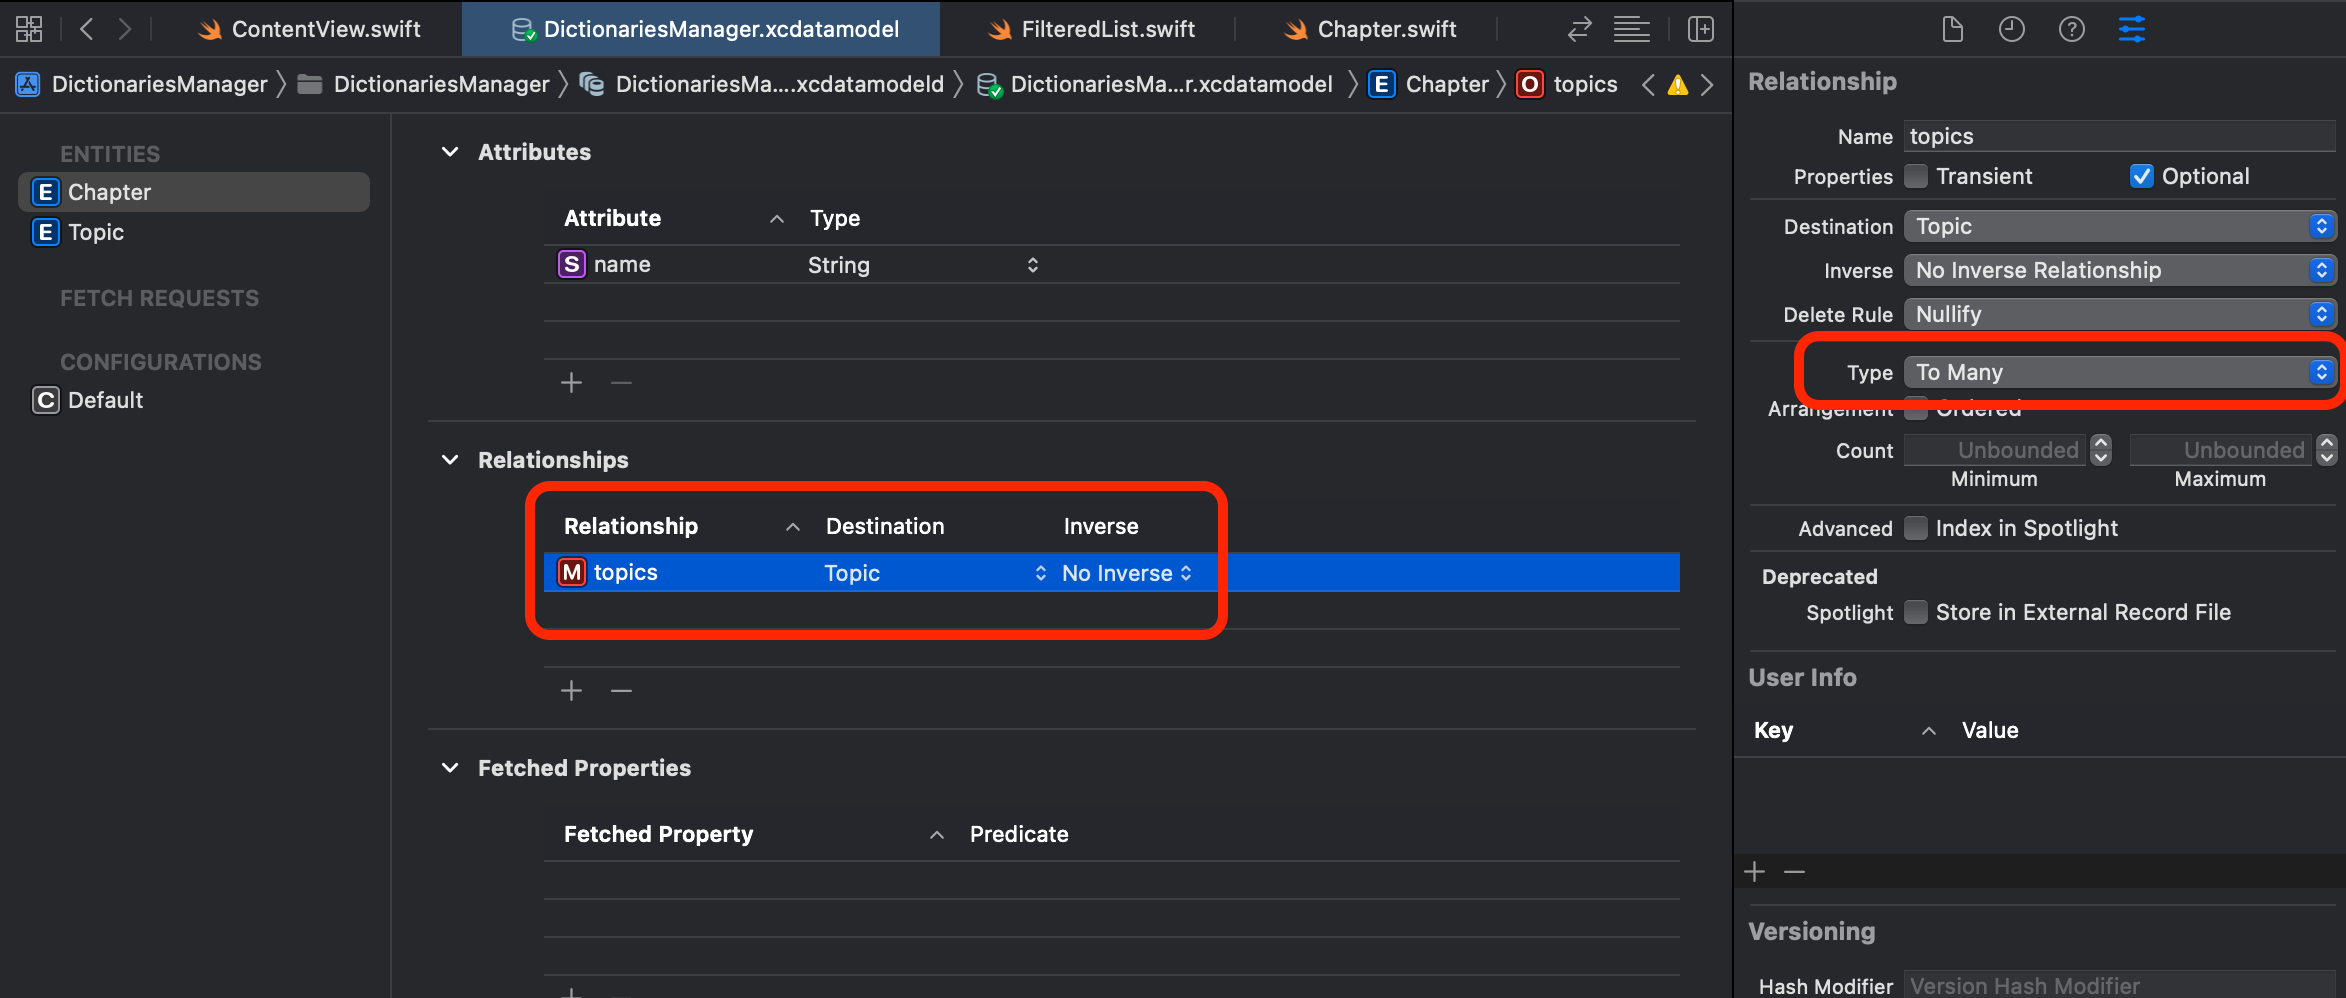
在Chapter的Entity中找到Relationship增加一项,我们命名为topics,设置它的Destination为Topic,最后别忘了在这个relationship的inspector的type里设置为To Many,如下图所示:
在Topic里设置对应一个Chapter
与在Chapter中所做的类似,以下是我们为Topic所做的relationship的设置,你会发现在Inverse中会出现刚才我们写的topics,选中它就好了:

再回到Chapter中,会发现Inverse也自动变为了chapter。
一对多的Style
在右下角有一个Style的视图选择,点之后,我们会看到一个数据库模型视图:
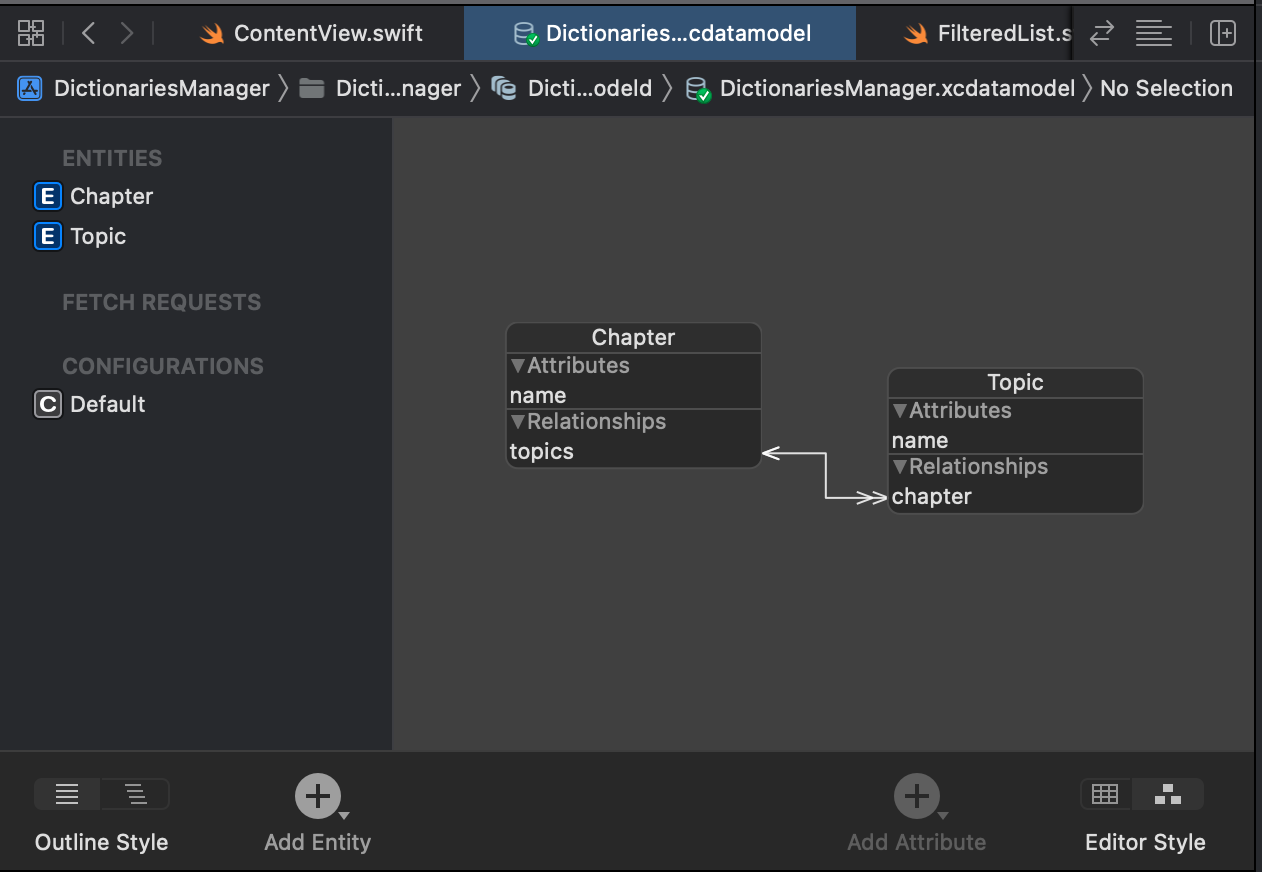
这个视图有效的表现了一对多的效果,看着它又让我感觉回到了PB的时代(直观但用的不多)。
组织Entity的ViewModel
Chapter的ViewModel
import Foundation

struct ChapterViewModel{
    let name:String
    let topics: [Topic]
}

extension Chapter{
    var viewModel : ChapterViewModel{
        let topicSet = topics as? Set<Topic> ?? []
        return ChapterViewModel(
            name: name ?? "Unknow Chapter",
            topics: topicSet.sorted{
                $0.viewModel.name < $1.viewModel.name
            }
        )
    }
}
在CoreData中的topics还是使用的NSSet数据类型,所以我们看到在这里通过一个转换,将NSSet转换为Array,顺手给它做了一个排序。
Topic的ViewModel
import CoreData
import Foundation

struct TopicViewModel{
    let name:String
    let chapter: Chapter?
}

extension Topic{
    var viewModel : TopicViewModel{
        return TopicViewModel(
            name: self.name ?? "Unknow Topic",
            chapter: self.chapter
        )
    }
}
Topic的ViewModel其实非常简单,看代码就不解释什么了。
重新组织Preview
由于我们的Entity多出了Topic,所以需要重新组织Preview数据,这是新的Preview内容:
static var preview: PersistenceController = {
    let result = PersistenceController(inMemory: true)
    let viewContext = result.container.viewContext
    for i in 0...3 {
        let newItem = Chapter(context: viewContext)
        newItem.name = "Chapter \(i)"
        for j in 1...3{
            let newTopic = Topic(context: viewContext)
            newTopic.name = "Chapter \(i) Topic \(j)"
            newItem.addToTopics(newTopic)
        }
    }
    do {
        try viewContext.save()
    } catch {
        let nsError = error as NSError
        print("Unresolved error \(nsError), \(nsError.userInfo)")
    }
    return result
}()
将数据显示出来
为了简单,在这里我只是简单的修改了一下ContentView.swift,使用List里的Section来显示Chapter,再使用Text显示Chapter中的Topic:
import SwiftUI
import CoreData

struct ContentView: View {
    @Environment(\.managedObjectContext) private var viewContext

    @FetchRequest(
        sortDescriptors: [NSSortDescriptor(keyPath: \Chapter.name, ascending: true)],
        animation: .default)
    private var items: FetchedResults<Chapter>

    var body: some View {
        NavigationView {
            List{
                ForEach(items){item in
                    Section(item.viewModel.name){
                        ForEach(item.viewModel.topics){ topic in
                            Text(topic.viewModel.name)
                        }
                    }
                }
            }
            .toolbar {
                ToolbarItem(placement: .navigationBarTrailing) {
                    EditButton()
                }
                ToolbarItem {
                    Button(action: addItem) {
                        Label("Add Item", systemImage: "plus")
                    }
                }
            }
            Text("Select an item")
        }
    }

    private func addItem() {
        withAnimation {
            let count = items.count
            let newItem = Chapter(context: viewContext)
            newItem.name = "Chapter \(count)"

            for i in 1...3{
                let newTopic = Topic(context: viewContext)
                newTopic.name = "\(newItem.viewModel.name) topic \(i)"
                newItem.addToTopics(newTopic)
            }

            do {
                try viewContext.save()
            } catch {
                print(error.localizedDescription)
            }
        }
    }
}

struct ContentView_Previews: PreviewProvider {
    static var previews: some View {
        ContentView().environment(\.managedObjectContext, PersistenceController.preview.container.viewContext)
    }
}
注意,代码中的Edit只是看并没有什么别的用处,但是+号还是会正常的工作的,当然我们也可以看到如何展示一对多数据的效果。