小朋友喜欢骑车,所以就想为自己的骑行定制一个App。所以我特别准备了这个小纸条记录了今天我们上课时所列出的他获取、记录、显示坐标所需要的技术。主要是MapKit和Core Location相关。
显示一个地图
显示一个地图需要四样东西:Map是一个View来显示地图,它需要一个MKCoordinateRegion用来告诉它显示的位置(CLLocationCoordinate2D)以及缩放显示的范围(MKCoordinateSpan)。
MKCorrdinateRegion
这是一个 MKCorrdinateRegion 的声明:
@State var coordinateRegion = MKCoordinateRegion(
    center: CLLocationCoordinate2D(
        latitude: 37.330828,
        longitude: -122.007495),
    span: MKCoordinateSpan(
        latitudeDelta: 0.1,
        longitudeDelta: 0.1)
)
MKCoordinateRegion需要两个参数,center是地图的中心坐标(CLLocationCoordinate2D),span是缩放的范围(MKCoordinateSpan)。
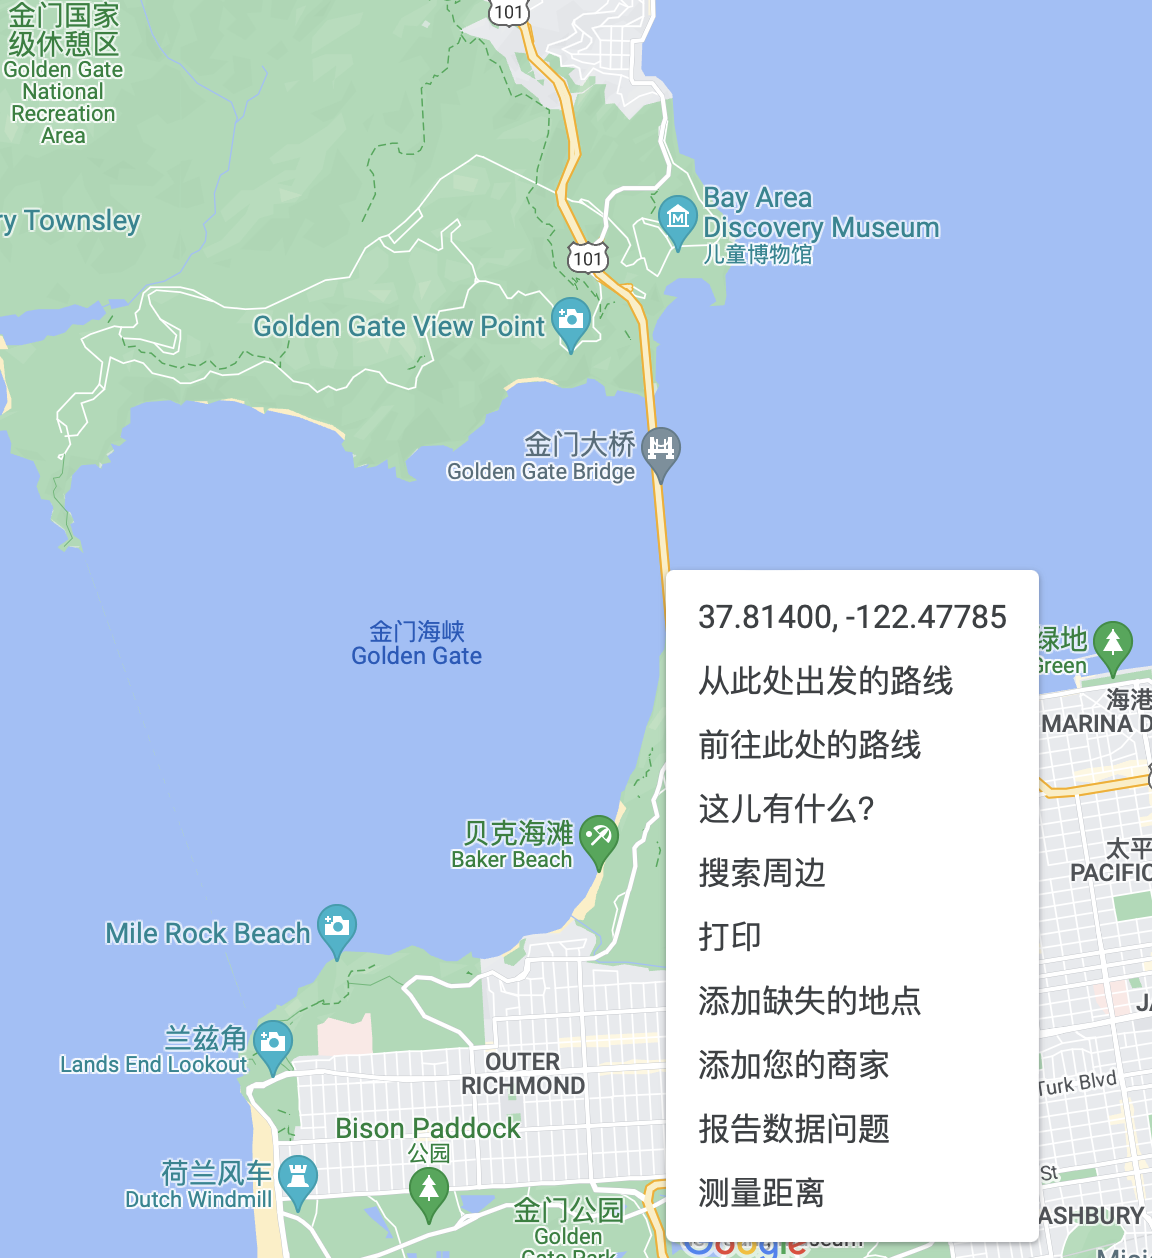
CLLocationCoordinate2D也是两个参数,latitude是纬度,longitude是经度。一个坐标的经纬度数据可以通过Google Map和Apple Map来得到,我比较喜欢在Google Map上点右键在菜单里就可以复制这个位置上的坐标信息:
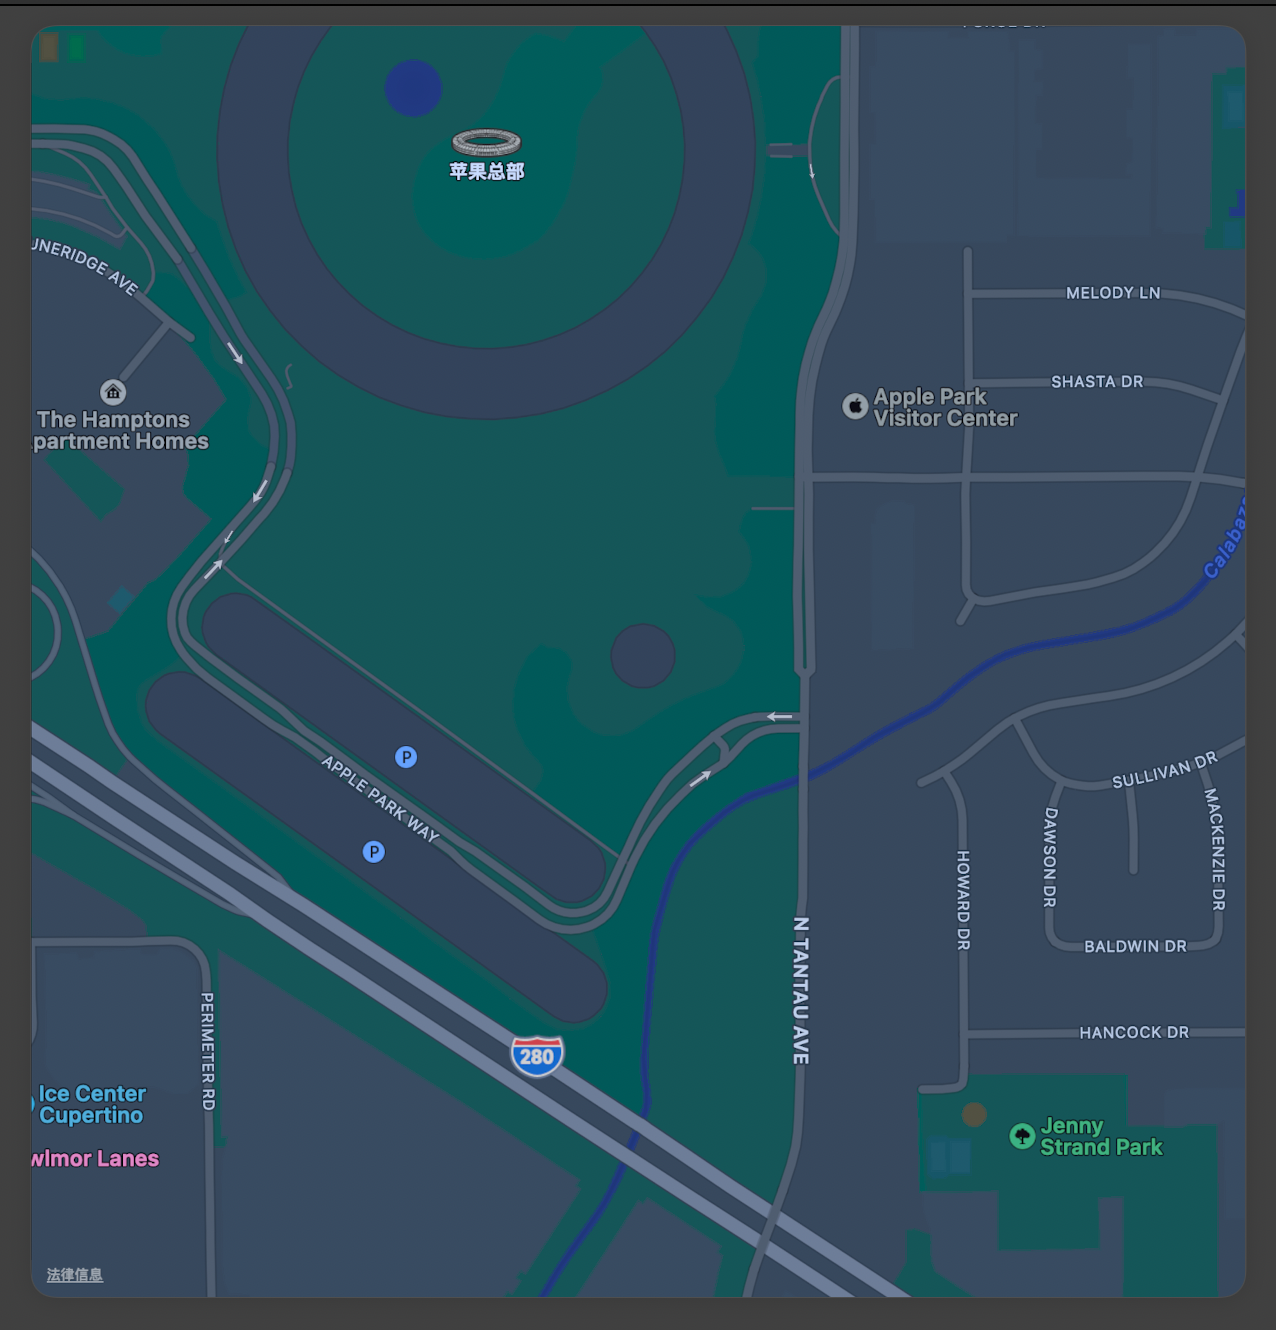
MKCoordinateSpan的两个参数latitudeDelta和longitudeDelta分别代表着纬度(南北)跨度和经度(东西)跨度。你放入的数值越大,显示的范围越大、地图中的物体越小。为了对比我们先看看跨度为0.01的地图:
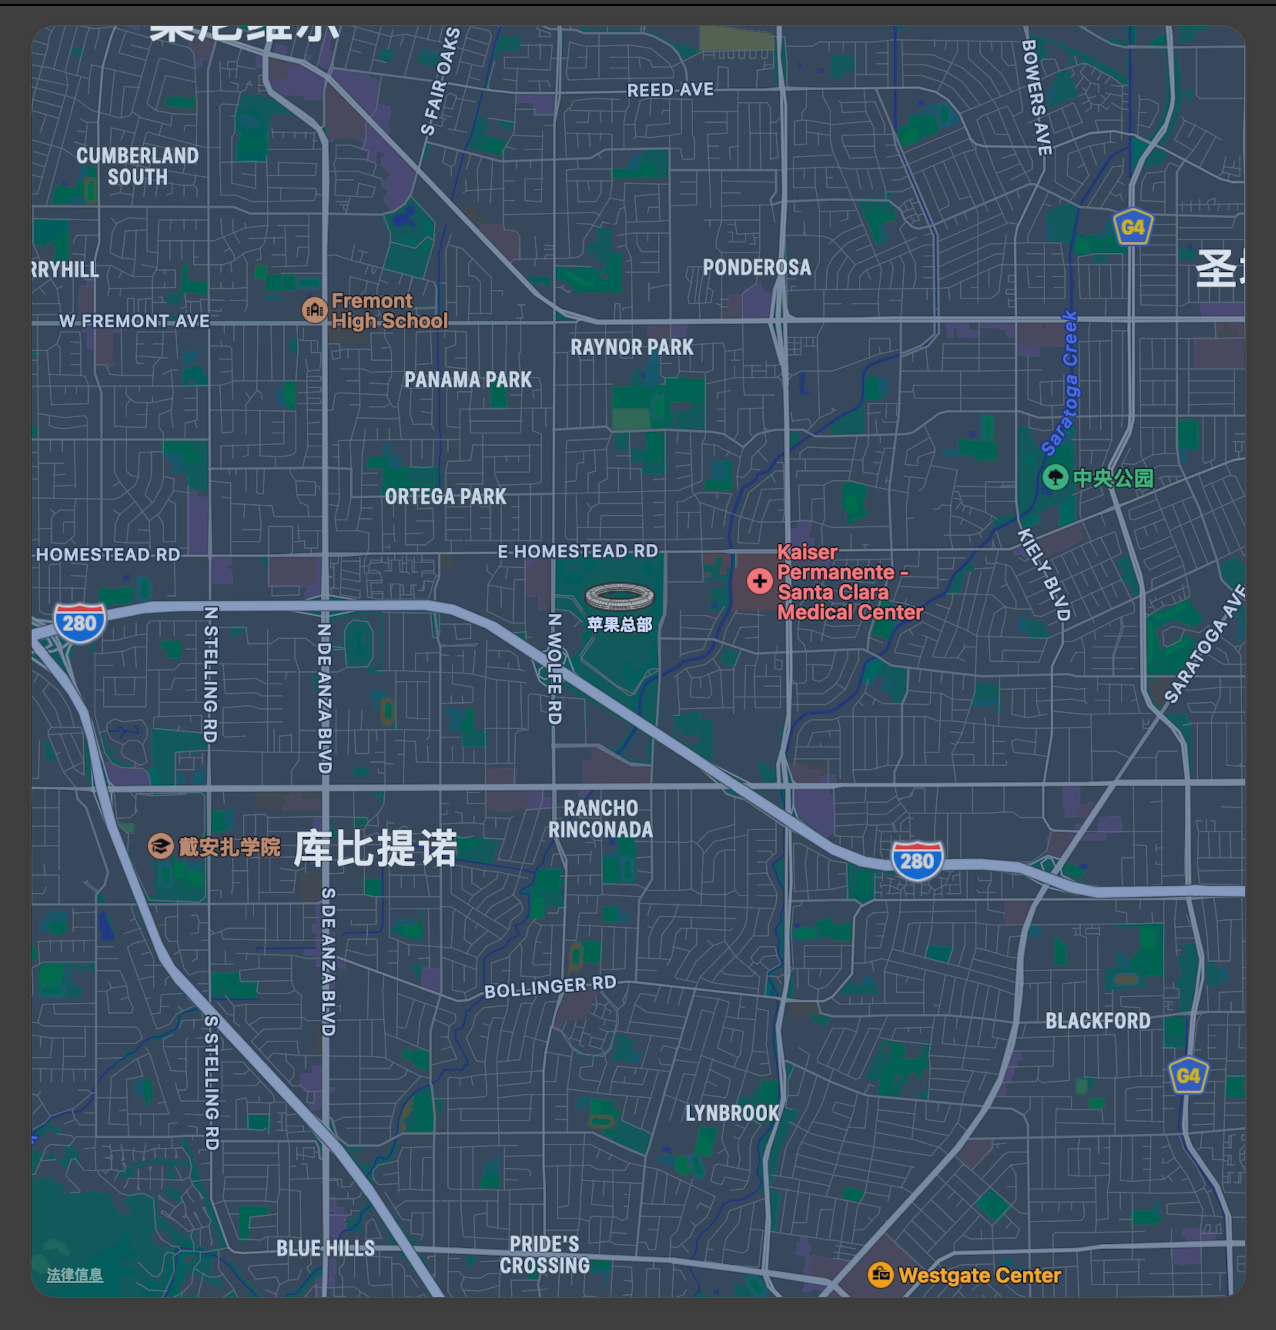
如果我们把它变为0.08,苹果总部就变的小小的一点了:
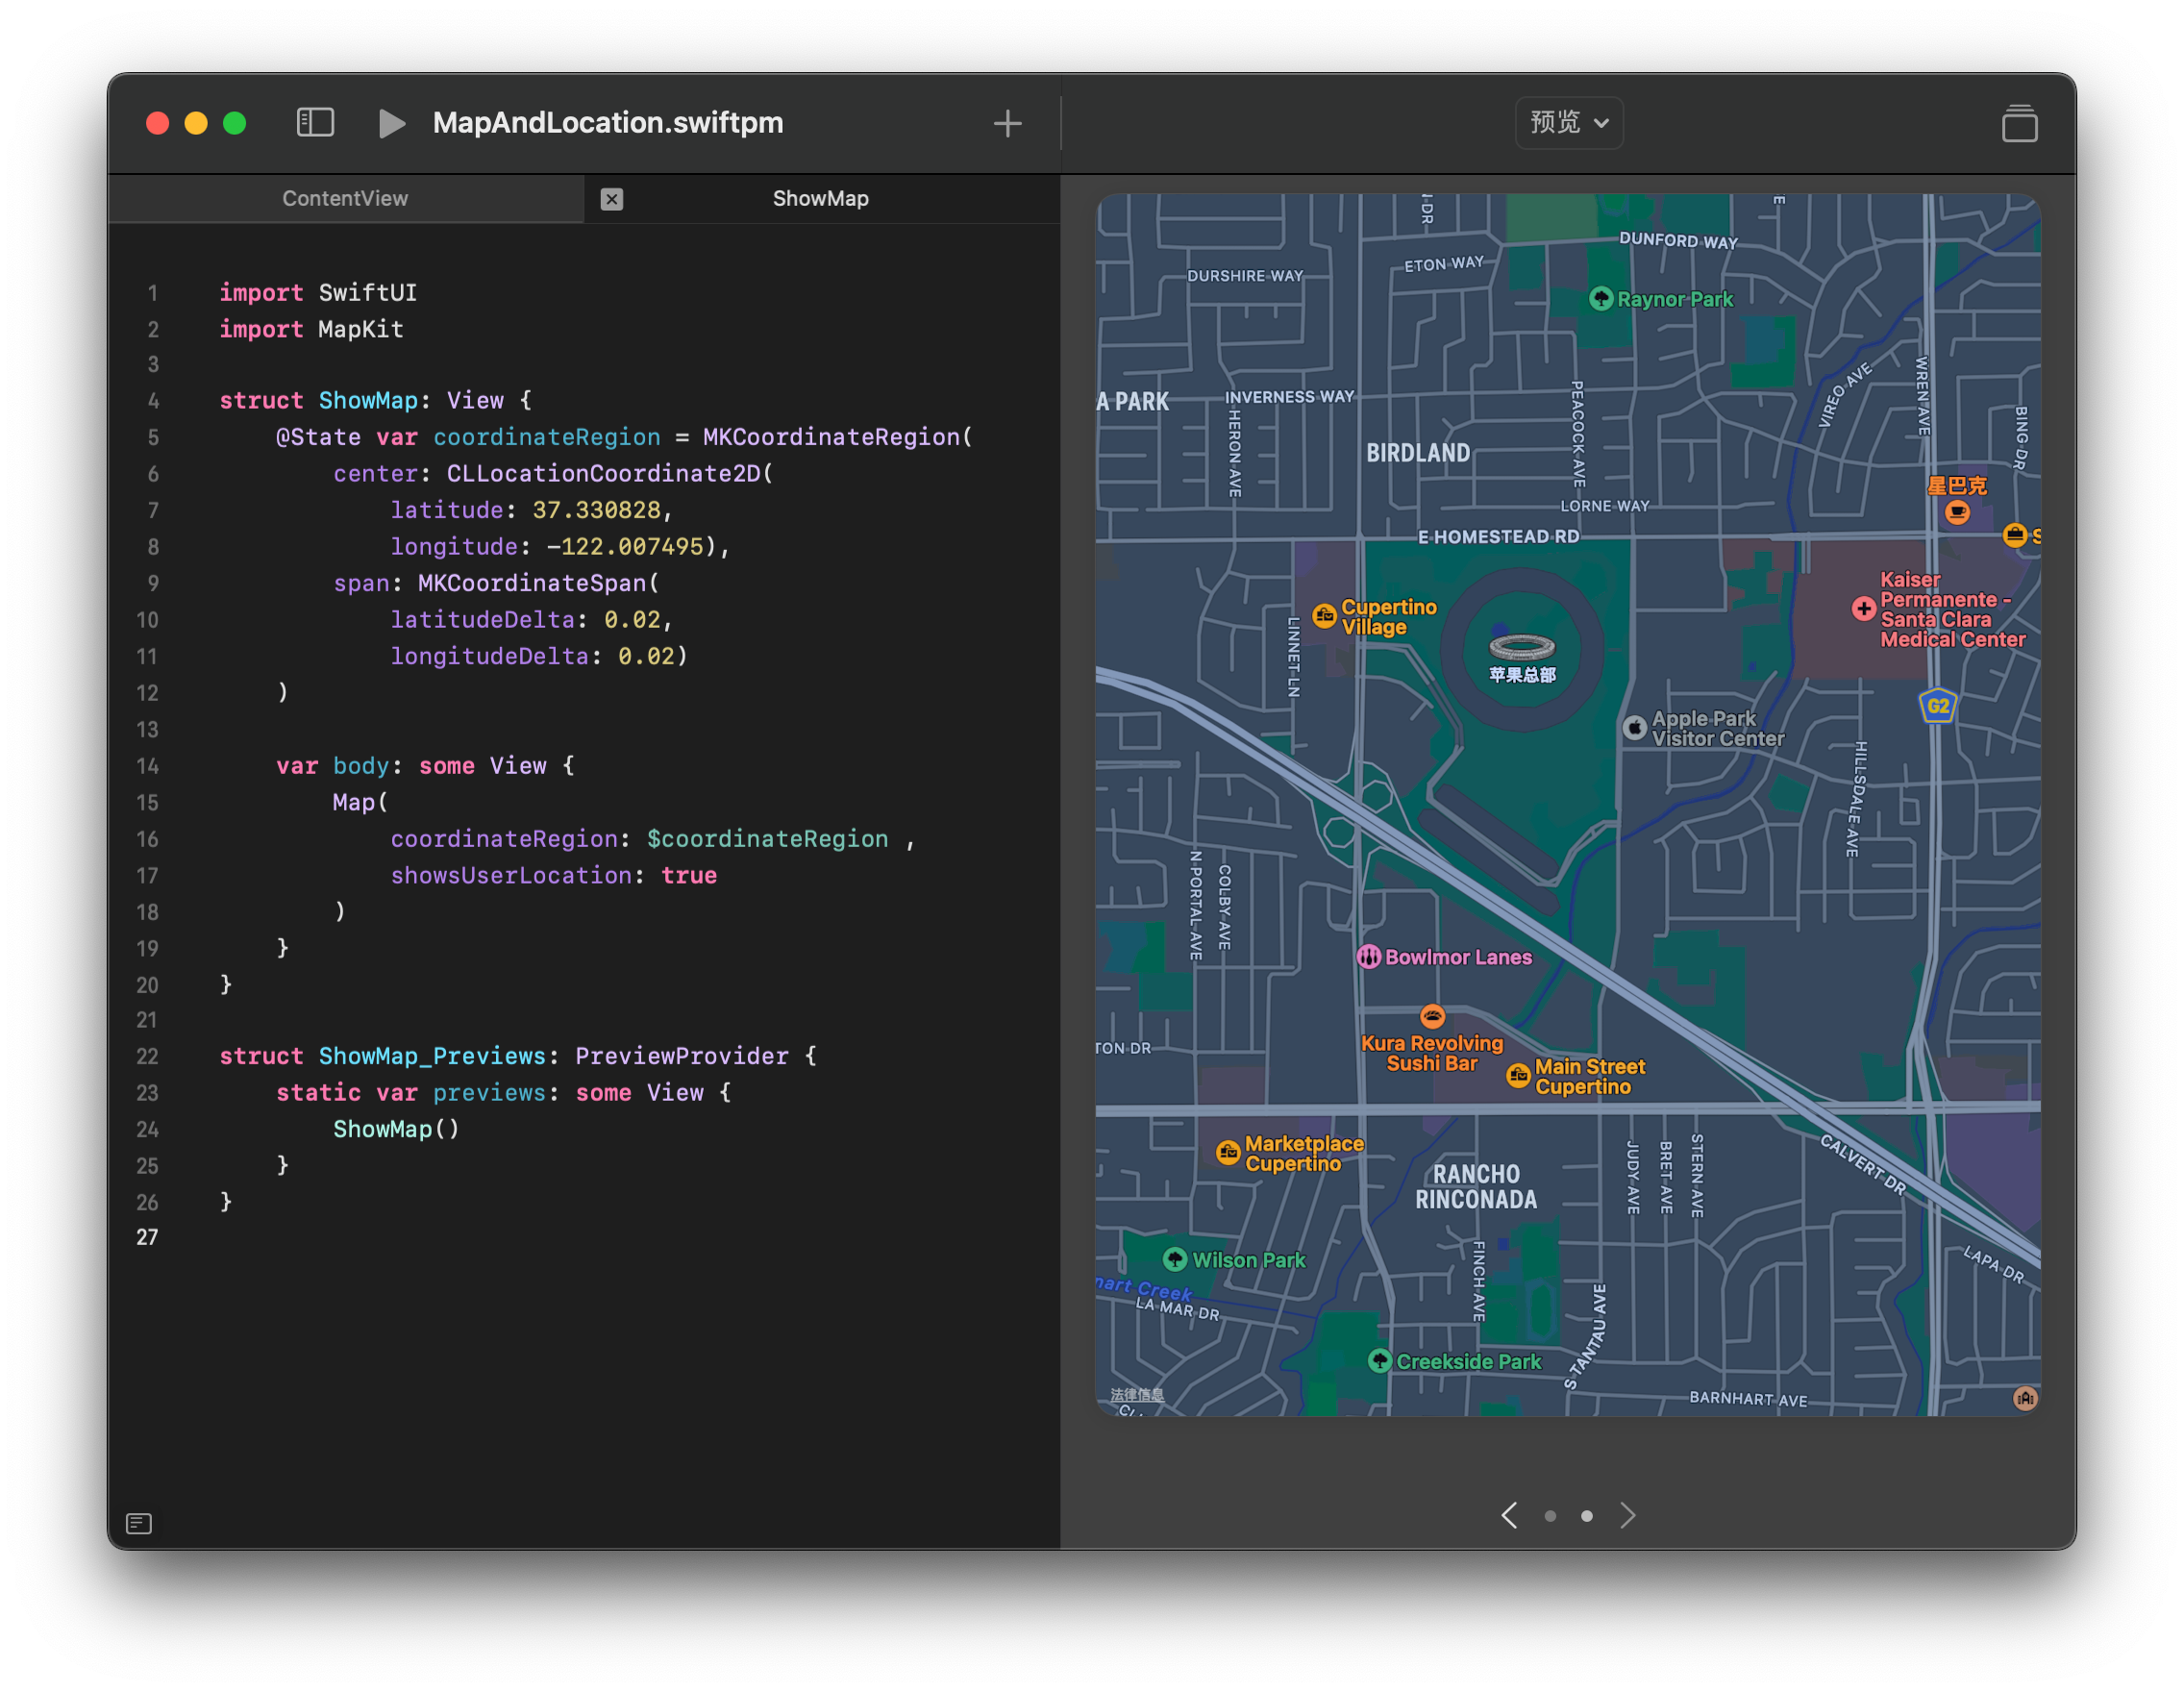
Map
在SwiftUI里显示一张地图还是非常简单的,MapKit提供了Map来使用,非常简单:
Map(
    coordinateRegion: $coordinateRegion ,
    showsUserLocation: true
)
Map通常会使用两个参数,coordinateRegion需要一个Binding,用来初始化显示的区域,你移动Map View里的地图时,这个数据会被改变。showsUserLocation会使用一个蓝点来显示你的当前位置。有关更多参数可以查看官方文档。整体来讲效果还是不错的:
获取位置信息
苹果官方写了一个文章Using the Standard Location Service说明如何获取位置信息。还有一个文章说明了如何更为省电的获取位置信息Using the Significant-Change Location Service。这里我主要说明下第一个方法的实现,因为官方的文档看完了,我确实花了不少时间去尝试。
这是我定义的LocationManager,实现了官方文档的说明
import CoreLocation

class LocationManager: NSObject,ObservableObject{
    static let shared = LocationManager()
    static let DefaultLocation = CLLocationCoordinate2D(latitude: 37.330828,longitude: -122.007495)
    static var currentLocation: CLLocationCoordinate2D {
        guard let location = shared.locationManager.location else {
            return DefaultLocation

        }
        return location.coordinate
    }

    private let locationManager = CLLocationManager()

    override init(){
        super.init()
        locationManager.delegate = self
        locationManager.desiredAccuracy = kCLLocationAccuracyBest
        locationManager.requestWhenInUseAuthorization()
        locationManager.startUpdatingLocation()
    }
}

extension LocationManager: CLLocationManagerDelegate{
    func locationManager(_ manager: CLLocationManager, didUpdateLocations locations: [CLLocation]) {
        if let location = locations.last {
            print(location)
        }
    }
    public func locationManager(_ manager: CLLocationManager, didFailWithError error: Error) {
        print("Location manager failed with error: \(error.localizedDescription)")
    }

    public func locationManager(_ manager: CLLocationManager, didChangeAuthorization status: CLAuthorizationStatus) {
        print("Location manager changed the status: \(status)")
    }
}
这里特别说明一下,如果你在iPad上运行这个程序,会看到基本每秒都会print(location)一下,如果你想要自动化记录,在locationManager的didUpdateLocations函数中记录是个不错的主意。如果你只是想获取当前的位置信息,就可以很方便的通过一句话来获取了:
let location = LocationManager. currentLocation