通过Python使用Azure Speech服务小纸条
某天推友发出一段Azure Speech服务的读音,听着非常不错,去试用了一下,发音流畅已经完成可当人声来听了。而学习英语小助手一直使用的是Apple自家的翻译发音,它的效果非常棒,但是可用性不是很好。所以我就想使用Microsoft Azure Speech服务来生成要学习的内容的发音,然后通过SwiftUI调用AVPlayer在学习英语小助手里直接来听单词(也许将来还会有文章)的发音。
官方资源
微软官方的文档我看了半小时,完全没有让我失望,达到了现如今所有云厂商的水准:写了一个没有任何用的文档。
微软官方示例我看了十分钟,非常不错,真的是代码解千愁,工程师还是用代码说话比较方便,写文档什么的都是上世纪微软工程师的拿手戏了。在这里有一个专门的分类,讲述了从文本到语音的Demo示例说明。以下记录下其中的要点。
安装
如果是Linux需要安装相关的系统软件包:
sudo apt-get update
sudo apt-get install libssl1.0.0 libasound2
安装python 软件包
pip install azure-cognitiveservices-speech
代码
官方给出来的示例代码在这里
这里是我自己最终测试完成的部分:
import azure.cognitiveservices.speech as speechsdk
from azure.cognitiveservices.speech import AudioDataStream,SpeechSynthesizer
from azure.cognitiveservices.speech.audio import AudioOutputConfig

# 这两个从Azure设置中可以找到
speech_key, service_region = "YourSubscriptionKey", "YourServiceRegion"
speech_config = speechsdk.SpeechConfig(subscription=speech_key, region=service_region)

# 这两个配置可以从 https://docs.microsoft.com/zh-cn/azure/cognitive-services/speech-service/language-support#prebuilt-neural-voices 找到
speech_config.speech_synthesis_language = "en-US"
speech_config.speech_synthesis_voice_name = "en-US-AriaNeural"

# 设置存为文件
audio_config = AudioOutputConfig(filename="/dev/null")
synthesizer = SpeechSynthesizer(speech_config=speech_config, audio_config=audio_config)

text="Hello English Helper"
result = synthesizer.speak_text_async(text).get()

# Checks result.
if result.reason == speechsdk.ResultReason.SynthesizingAudioCompleted:
    print("Speech synthesized to speaker for text [{}]".format(text))
    # 将音频存为文件
    stream = AudioDataStream(result)
    stream.save_to_wav_file("file.wav")
elif result.reason == speechsdk.ResultReason.Canceled:
    cancellation_details = result.cancellation_details
    print("Speech synthesis canceled: {}".format(cancellation_details.reason))
    if cancellation_details.reason == speechsdk.CancellationReason.Error:
        if cancellation_details.error_details:
            print("Error details: {}".format(cancellation_details.error_details))
    print("Did you update the subscription info?")
所以,接下来,你会在Apple的App 学习英语小助手里听到由Python调用Microsoft的Azure云AI生成的语音了(想想我写程序真的就只是图省事儿啊)。
附
这个result.reason一定要做,是因为Azure对于并发还是做了限制的,像我这样一批生成语音的,就需要多执行一些次才可以将所有的单词发音生成完毕。这是它的出错的样子:
Speech synthesis canceled: CancellationReason.Error
Error details: Connection was closed by the remote host. Error code: 1007. Error details: Throttled due to too many requests USP state: 3. Received audio size: 0 bytes.
看起来这个是单个IP单位时间发出的请求的限制。因为当我这样请求出现Error时,网页上的JS也无法使用的。
小助手有不到六百个单词,消耗不到6k的额度,感觉还可以
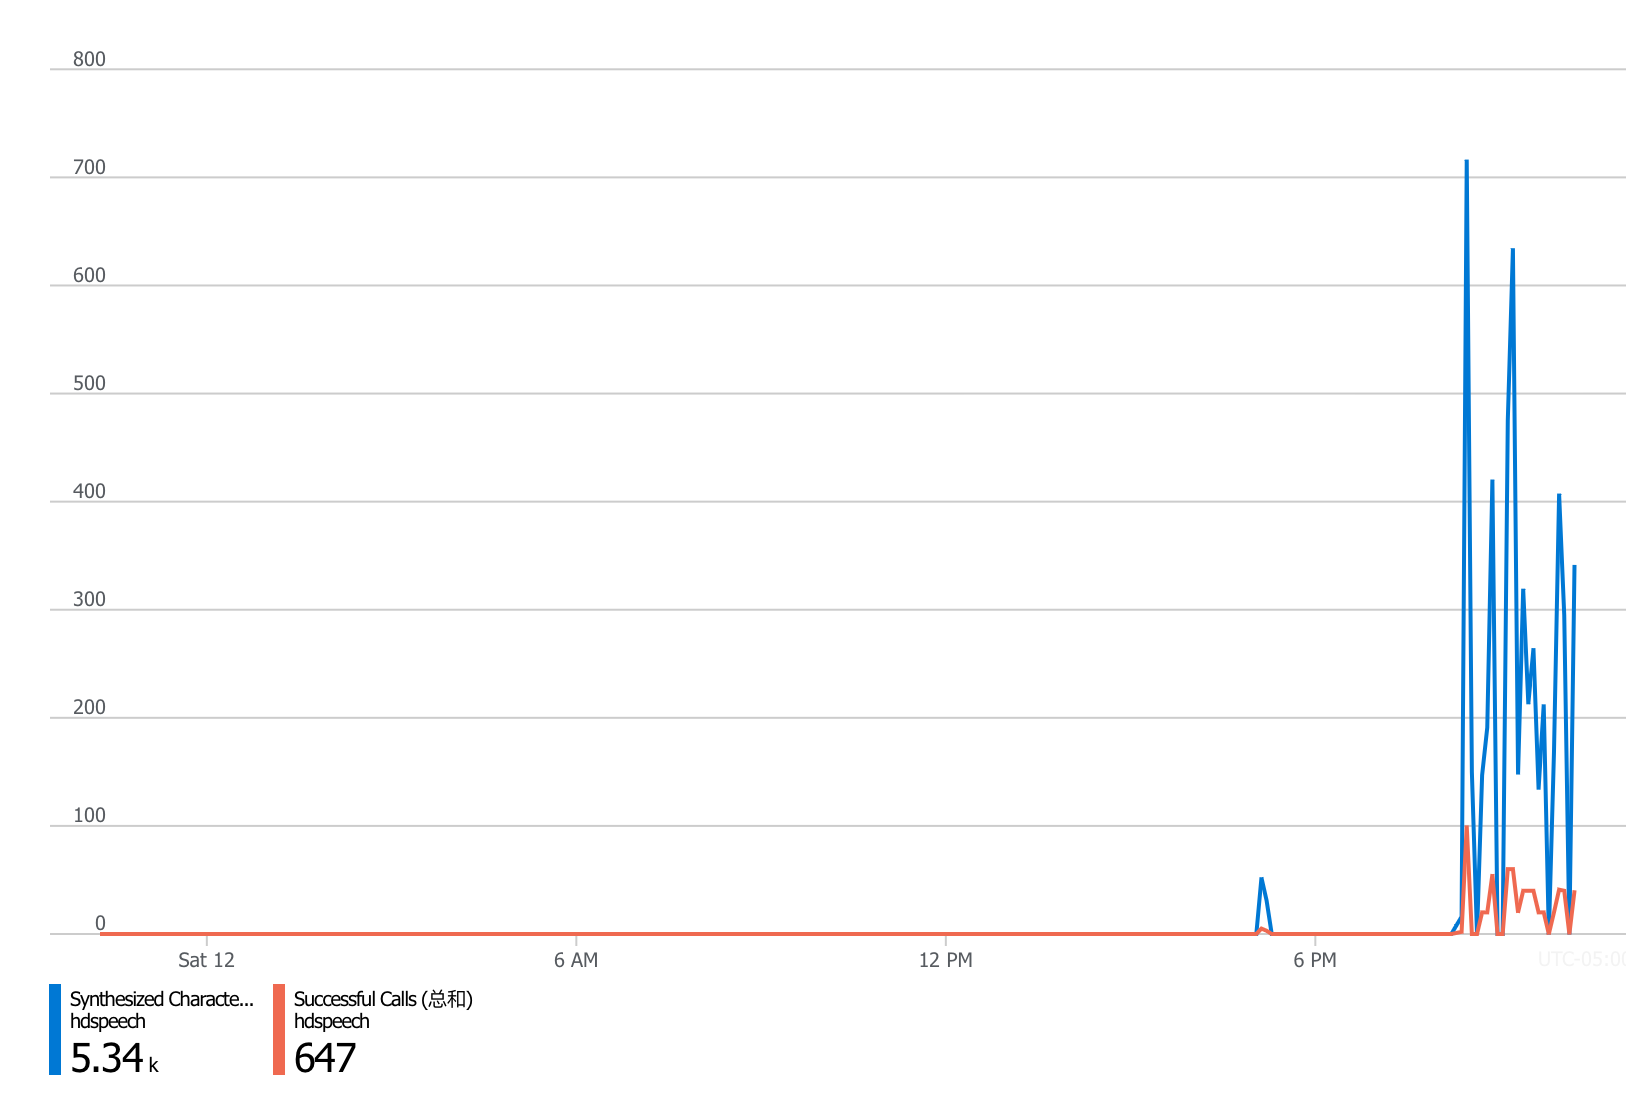
不知道将来把一些文章放进来会是什么样。